
Most gardens are designed for what happens in fair weather: bloom, shade, fragrance, fruit, the shape of a border from a kitchen window. A rain garden begins with a less glamorous question. Where does the water go when the roof, path, driveway, and lawn stop absorbing it?
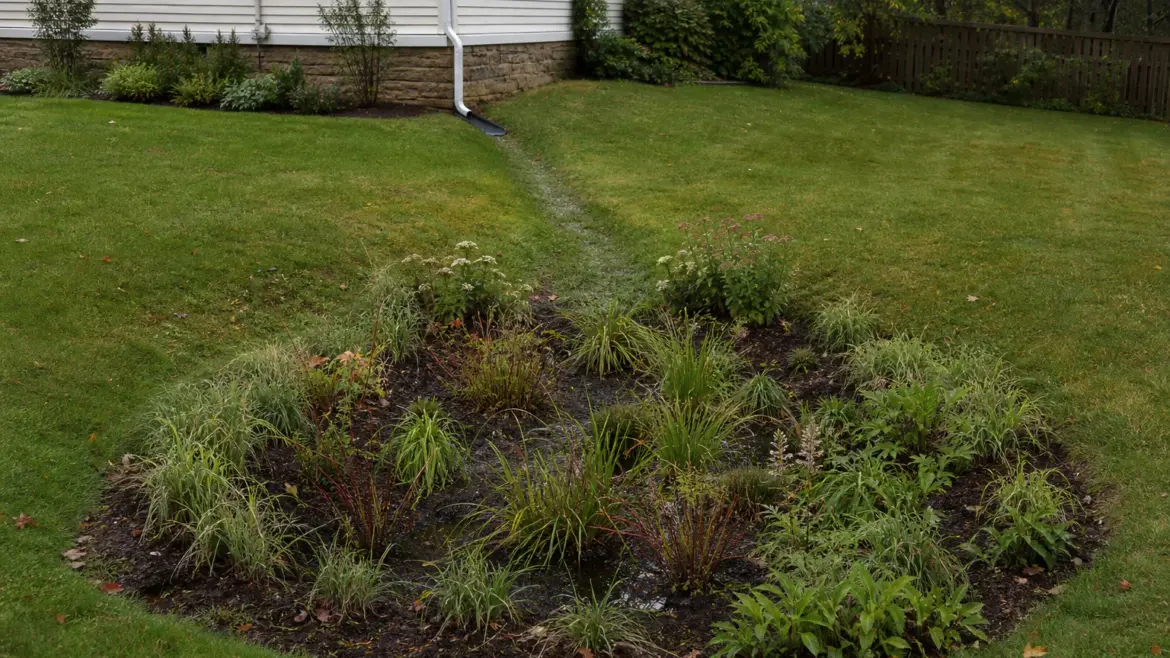
On a hard rain, the answer can be surprisingly visible. Water leaps from a downspout, glazes over compacted soil, races along a path, picks up bits of mulch and fertilizer, and heads for the street. A rain garden slows that little escape. It is a shallow planted basin that catches runoff from a roof, driveway, or other hard surface and gives the water time to soak into the soil.
That makes a rain garden feel both practical and quietly poetic. It is infrastructure that blooms. The U.S. Environmental Protection Agency describes rain gardens as depressed landscape areas that collect rainwater from roofs, driveways, or streets, allowing it to soak into the ground while planted grasses and perennials help reduce runoff and support wildlife.1 In the garden, that definition becomes something you can see: a low place made useful, a brief puddle turned into root work.
Why roof water deserves a garden
Rain falling on a meadow behaves differently from rain falling on a roof. In a meadow, water meets stems, litter, pores, roots, fungi, and uneven soil. It is slowed at every level. On a roof or driveway, it becomes a sheet and then a stream. The more hard surface a neighborhood has, the more rainwater moves quickly toward gutters, drains, streams, and low streets.
A rain garden does not solve every stormwater problem, and it should not be sold as a magic drain for a chronically wet yard. Its strength is more specific. It gives ordinary, low-risk residential roof runoff a planted pause before that water leaves the property. EPA notes that rain gardens can help filter pollutants, but the Wisconsin homeowner guide sets an important boundary: its method is intended for landscaped areas receiving runoff from small rooftops, while parking lots, busy streets, and other heavily used paved areas may require pretreatment.12 If the contributing surface carries vehicle fluids, industrial residue, or another known contaminant, ask the local stormwater authority whether infiltration is appropriate.
For a gardener, that means the design is doing double duty. You are making a border with seasonal flowers, seedheads, grasses, and insects. You are also shaping a small piece of hydrology: where water slows, where it spreads, where it sinks, and what roots it must pass on the way down.
First, watch the storm
The most useful design session happens during rain. Put on a jacket and watch the water. Which downspout is doing the most work? Does water run straight across the lawn or disappear near the foundation? Does one path behave like a tiny stream? Where does mulch wash away? These observations matter more than a beautiful sketch made on a dry afternoon.
Look especially for sources, routes, and exits. The source might be half the roof, a patio, or a stretch of compacted driveway edge. The route may already exist as a shallow swale or a line of greener grass. The exit might be a sidewalk, storm drain, ditch, or neighbor’s property. A rain garden should intercept runoff before it becomes a nuisance, not simply decorate the place where water already sits too long.
The Wisconsin rain garden guide makes this distinction clearly: it can be tempting to put a rain garden in a place where water already ponds, but those wet patches often show slow infiltration rather than opportunity.2 A rain garden is supposed to drain. If water naturally lingers for days, the site may need grading, soil work, drainage repair, or a different strategy altogether.
Choose a site that can actually drain
The best rain garden site is close enough to receive runoff, but far enough from structures to avoid sending water where it can cause trouble. Both the Wisconsin and Nebraska guides use at least 10 feet from a house foundation as a residential starting point.23 Their well, septic, groundwater, and bedrock setbacks differ, which is exactly why local health, building, and stormwater rules take precedence. Locate utilities before digging; in the United States, contact 811, and remember that private lines may need separate locating. Avoid heavy foot-traffic areas and digging where it could damage established tree roots.
Then test the soil with one complete local protocol. Wisconsin’s guide uses a 6- to 12-inch-deep hole, presoaks it for an hour, refills it, and measures the water-level drop over the next hour so the result can feed its sizing table.2 Nebraska’s quicker screening method uses a 6-inch-deep hole and requires it to drain within 24 hours; it warns that dry, cracked summer soil can give a misleading result and uses 0.25 inch per hour as its minimum design infiltration rate.3
The method and its pass-or-fail threshold belong together. Do not borrow the hole dimensions from one guide and the timing rule from another. Follow the locally approved test, ideally in the wet season and at more than one point in the proposed basin. If water lingers, shallow groundwater or bedrock is a concern, or local criteria are not met, choose another site or ask a stormwater or soil professional before committing plants and labor. Digging a deeper bowl does not repair slow subsoil.
Size it like a basin, not a pond
A rain garden should hold water briefly, then empty. It is not a pond, a bog, or a decorative wetland. That distinction affects both size and depth. The Nebraska guide describes a typical residential rain garden as 100 to 300 square feet, with depth often between 4 and 8 inches depending on slope, and notes that a deeper garden may take too long to drain.3 Those figures are useful starting points, not a universal specification.
If that sounds large, remember that even a modest basin can help. Wisconsin’s guide notes that any reasonable size provides some runoff control, but its detailed sizing approach relates surface area to the contributing roof or lawn, tested infiltration, soil, depth, and the amount of runoff the design is meant to manage.2 A smaller, well-sited rain garden near one downspout is often better than a heroic excavation that never quite gets finished, provided excess water still has a safe route.
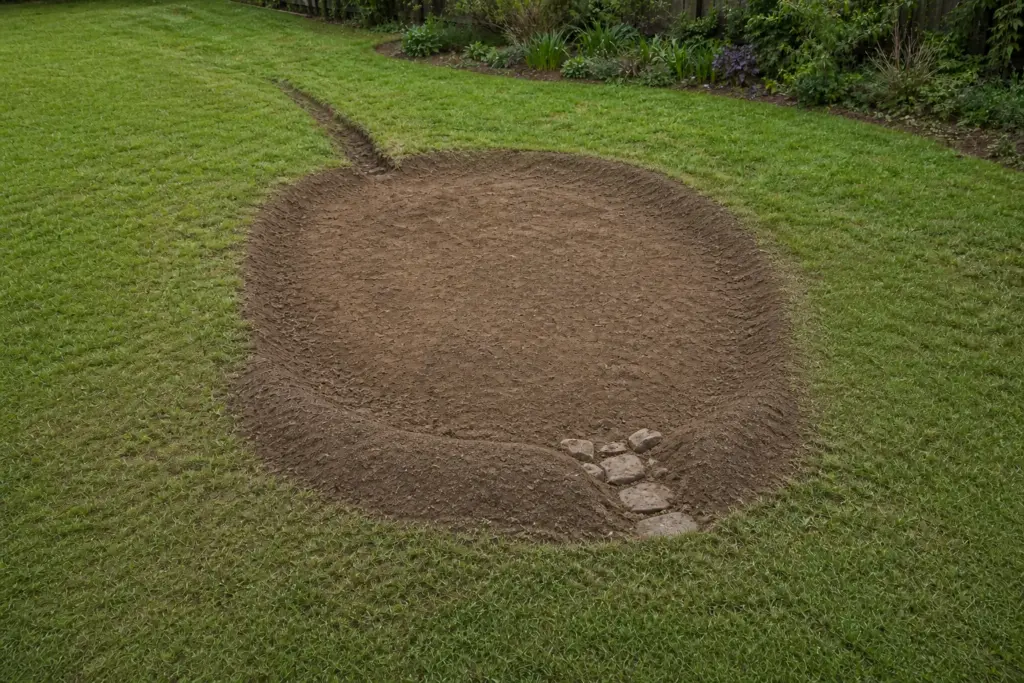
Shape also matters. A crescent, kidney, oval, or long shallow arc often sits more naturally in a garden than a rectangle. The basin bottom should be roughly level so water spreads rather than cutting one channel through the mulch. On a gentle slope, use some of the excavated soil to form a low berm on the downhill side. Make that berm broad, stable, and gently sloped, not a narrow ridge that erodes at the first serious storm.23 Include a deliberate overflow for storms larger than the basin was designed to hold, and route it away from foundations, paths, neighboring land, and unstable slopes.4
Plant by moisture zone
The center of a rain garden lives a different life from the rim. The lowest point may be wet after storms and dry between them. The slope may swing between moist and merely fresh. The upper edge may behave almost like an ordinary perennial border. Planting all three places with the same species is the usual mistake.
Use the wettest center for plants that tolerate temporary ponding as well as dry intervals, the middle for plants suited to intermediate moisture, and the rim for species that handle ordinary garden dryness once established. Penn State describes the same wet-to-dry gradient and recommends matching plants to each position.4 In suitable parts of eastern or central North America, blue flag iris, cardinal flower, swamp milkweed, sedges, and rushes are possible wet-zone choices. Elsewhere, start with a regional rain-garden list rather than exporting those names to a different flora.
Regionally native plants are often the backbone of a rain garden, but native origin and site suitability are not synonyms. Nebraska Extension notes that both native and adapted plants can work and that adaptation to the garden’s specific wet-dry cycle is central to success; deep, renewing roots can also improve soil structure over time.3 Match every species to climate, light, soil, mature size, deer pressure, salt exposure, and the exact moisture zone. A plant that is perfect in a wet meadow may be far too large for a narrow front-walk basin.
Design with drifts rather than one of everything. Nebraska Extension recommends masses that vary in width and length and overlap to unify the planting.3 Repeating a few sturdy, site-matched species will look more intentional and make young plants easier to distinguish from weeds. A rain garden can be ecological without looking abandoned. The eye appreciates rhythm, especially in a part of the yard that may look bare or muddy while new plants are still knitting together.
Make the inlet beautiful
The inlet is where many rain gardens reveal whether they were designed as gardens or merely dug as holes. Water leaving a downspout has force. If it lands directly on bare soil or loose mulch, it will carve a channel, bury crowns, and carry the lightest material into the basin.
Give the water a civilized arrival. A short runnel of stable stone, a splash block, a shallow vegetated swale, or a flat stone threshold can slow the stream before it reaches the planted basin. The goal is not to make a fake creek. It is to spread energy. University of Maine Extension recommends stabilizing the entry with stone and watching it through the first few storms for erosion.5 The runnel should lead water into the garden without sending it against the berm.
Mulch matters too. Wisconsin recommends about 3 inches of double-shredded mulch without burying plant crowns, while Maine warns that buoyant bark chips can float away.25 Use a locally appropriate, coarse organic material that stays put, and do not keep adding it until the basin loses storage depth. Expect the first year to involve a little editing after large storms. The garden will tell you where the water is too fast.
Care in the first year
A new rain garden is not maintenance-free. It is a young planting in a demanding position. Penn State identifies the first two years as the critical establishment period: water in dry weather, weed before seed set, replace failures, monitor mulch, and inspect drainage, inlets, and overflow areas after storms.6 The companion guide to inspecting a rain garden after its first storm follows the same water path from source to inlet, basin, and overflow. Small corrections made early prevent the garden from training water into the wrong path.
Once established, the work becomes more like ordinary perennial care: cutting back dead stems, dividing aggressive clumps, renewing mulch only where needed, and watching for sediment buildup at the inflow. Penn State notes that accumulated sediment can reduce infiltration and bury vegetation; remove excess deposits and repair the upstream bare soil or erosion that keeps supplying them.6 The lowest area should not slowly become higher because washed-in soil has accumulated there.
The best sign is boring: water arrives, spreads, sits briefly, and disappears. The plants lift, insects visit, seedheads stand through winter, and the roof runoff that once rushed away now spends a little time in the garden. That is the quiet engineering of it.
Useful rain garden supplies
- AcuRite wireless rain gauge: records rainfall so you can compare storm totals with drain-down time; it does not replace an infiltration test or a locally approved sizing method.5
- Luster Leaf Rapitest soil test kit: a home screening check for pH and basic nutrients before choosing plants. Confirm a consequential amendment with a local laboratory soil test; this kit does not measure infiltration.
- Corona extendable 3-tine hoe: useful for shallow weeding and redistributing displaced mulch without stepping into a wet basin. Avoid deep cultivation or repeated soil disturbance, which can damage roots and expose more weed seed.6
Final thoughts
A rain garden changes the gardener’s relationship with a storm. Instead of watching water hurry off the property as waste or trouble, you begin to see it as a visitor that needs a place to slow down. The basin fills, the roots work, and the garden briefly becomes a visible part of the water cycle.
Start with one downspout, one infiltration test, and a small basin you can maintain well. Make it beautiful enough that you will care for it, and functional enough that the next spring storm has somewhere better to go.
References
- U.S. Environmental Protection Agency: Soak up the Rain: rain gardens
- Wisconsin Department of Natural Resources: Rain gardens, a guide for homeowners and landscapers
- University of Nebraska-Lincoln Extension: Stormwater management, rain garden design for homeowners
- Penn State Extension: An introduction to rain gardens
- University of Maine Cooperative Extension: Adding a rain garden to your landscape
- Penn State Extension: Best practices for rain gardens