
Soil solarization is gardening’s most disciplined use of a hot spell. Instead of fighting July heat, you borrow it. A bed is watered deeply, covered tightly with clear plastic, and left under the sun until the upper soil becomes hot enough to weaken weeds, weed seeds, some soilborne diseases, and certain pests. It looks almost too simple: bare soil, plastic, patience, and weather.
The trick is that solarization is not mulching and it is not covering a bed to hide weeds. It is a temporary heat treatment. Clear plastic lets sunlight pass through and traps heat close to moist soil. UC IPM describes solarization as a nonchemical method that uses solar heating of moist soil, usually under transparent plastic, to manage pests in gardens and landscapes.1 Done well, it turns a summer pause into a quiet reset before fall planting.
Why clear plastic matters
The first surprise is the plastic. Gardeners often reach for black plastic when they think about heat, but solarization depends on light entering the system. Clear plastic allows shortwave solar radiation through. The dark, moist soil absorbs that energy, warms, and then loses heat more slowly because the plastic reduces convection and evaporation.
Black plastic can smother weeds by blocking light, and it can warm the surface, but it does not usually heat the soil as deeply as clear plastic in a solarization setup. UC IPM notes that transparent plastic is generally more effective than black plastic for solarization because it allows more solar radiation to reach the soil.2 That distinction is the difference between hiding weeds and cooking the weed seed bank near the surface.
The second surprise is moisture. Dry soil does not conduct heat as well as moist soil, and many soil organisms are more vulnerable to heat when conditions are moist. Before covering the bed, water it thoroughly without making mud. UC IPM recommends wetting the soil at least 12 inches deep for best results, then covering promptly to limit evaporation.1 Think of moisture as the heat’s messenger.
What solarization can and cannot do
Solarization is useful, but it is not a miracle. It can reduce many annual weed seeds near the soil surface. It can weaken some fungal pathogens, nematodes, and other pests, depending on temperature, duration, and depth. UF/IFAS describes soil solarization as a pest management method that uses clear plastic to trap solar energy and raise soil temperatures to levels that help suppress pests.3
The phrase “near the surface” matters. Heat is strongest in the upper inches and fades with depth. Deep perennial roots, buried rhizomes, and hardy seeds below the hot zone may survive. Bindweed, quackgrass, nutsedge, and other determined perennials may be slowed but not erased. If you expect solarization to sterilize an entire bed, disappointment is likely. If you use it as one tool in a larger weed and disease-management plan, it becomes much more useful.
It also affects more than pests. Soil is a living system, and heat changes microbial communities. The goal is not to make soil dead. Many beneficial soil organisms either survive solarization or recolonize quickly afterward, including mycorrhizal fungi and microbes that antagonize pathogens.2 The bed is not permanently purified; organisms from deeper layers and neighboring soil can return, so treat solarization as one step in an integrated plan.
The right season and site
Solarization asks for the strongest sun of the year. Rather than choosing a calendar month by habit, use the reliably hottest, sunniest stretch of your local summer. UC IPM calls July the most reliable month in inland California but notes that some coastal areas may not have suitable warm, fog-free weather until August or September.1 Shaded beds, cool coastal summers, cloudy stretches, and high-elevation gardens may still warm, but the effect will be weaker.
Choose a bed you can leave empty. This is not something to do between rows of living vegetables. The bed should be cleared, graded, watered, and covered. Raised beds are convenient because their edges help anchor the plastic, but in-ground beds can work too if the plastic can be sealed tightly at the edges.
If the soil has a serious disease history, identify the problem before relying on heat. Solarization may reduce some pathogens and pests, but different organisms have different heat tolerances and depths. UC IPM emphasizes that success depends on soil temperature, moisture, sunlight, treatment duration, and the sensitivity of the organism being targeted.1 A vague hope that “heat fixes soil” is not enough. The method works best when its limits are understood.
Preparing the bed
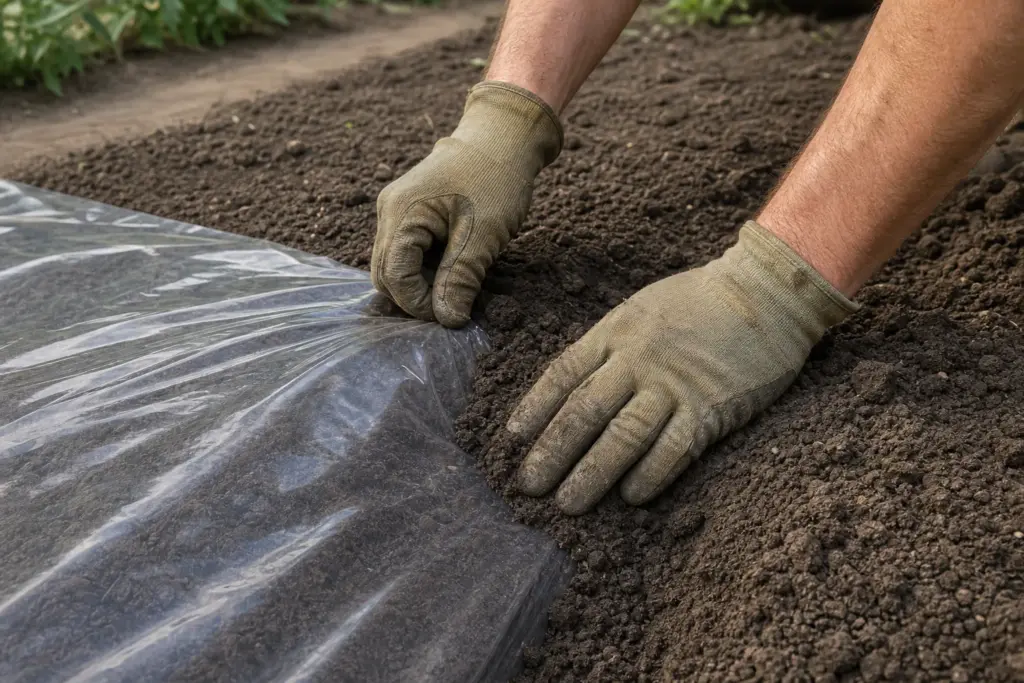
Start by removing existing plants, especially mature weeds with seed heads. Rake the bed smooth. Clods, sticks, and old stems can lift the plastic away from the soil and create small air pockets where heat escapes. A smooth bed also helps water spread evenly before the cover goes on.
Water deeply enough to moisten the intended treatment zone; UC IPM’s home-garden guidance calls for at least 12 inches where possible. If the soil is dusty, water, wait for it to infiltrate, and water again rather than leaving a muddy surface. A soaker hose can apply water slowly before covering, but remove it before final smoothing and laying the plastic so the sheet lies close to the soil and the hose is not exposed to solarization temperatures.
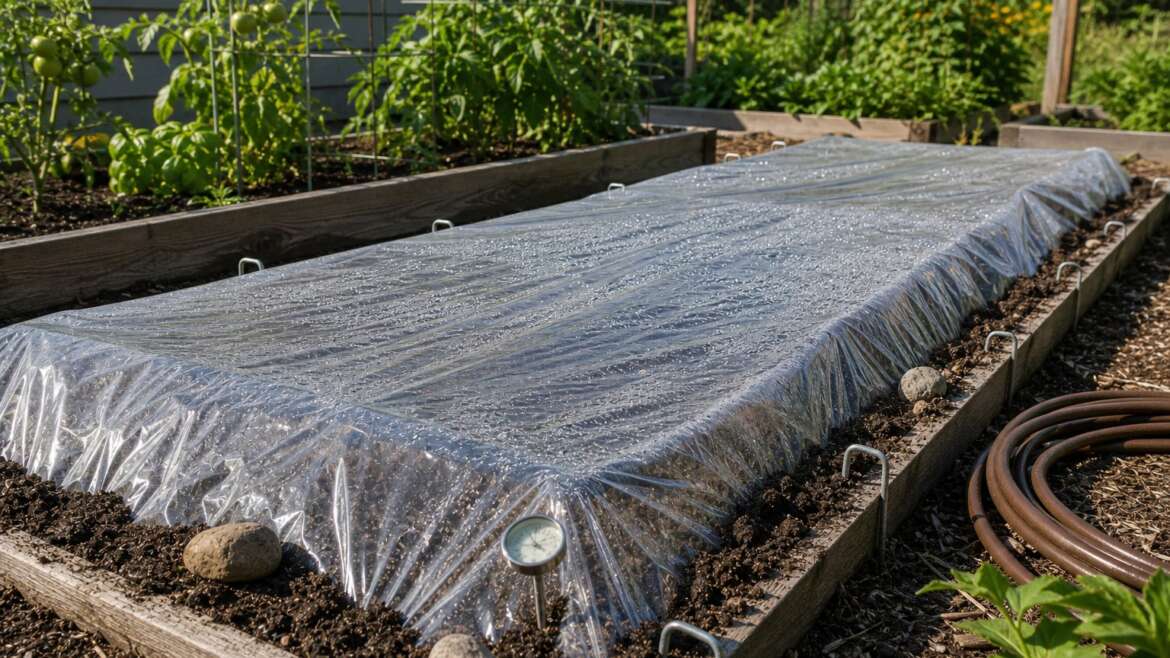
Then cover with clear plastic, pulling it as tight as practical and keeping it close to the soil. Bury the perimeter in a shallow trench and pack soil over it for the most reliable seal. On a raised bed, boards, stones, or staples can help hold the sheet while you create a continuous seal; widely spaced fasteners alone leave gaps where heat escapes. Loose edges turn a solarization bed into a warm, flapping tent. A tight seal turns it into a shallow greenhouse pressed against the soil.
How long to leave it covered
Most home-garden solarization runs for several weeks. In hot, sunny climates, four to six weeks may be enough for a strong effect near the surface. In cooler or cloudier conditions, longer may be needed, and results may still be modest. UC IPM notes that solarization commonly takes four to six weeks in warm weather, with longer periods needed in cooler areas.1
A soil thermometer can make the process less mysterious. Place a probe before sealing, or make one small access point that can be patched, rather than repeatedly lifting an edge. UC IPM gives a target of daily maximum temperatures around 110–125°F in the top six inches; readings at more than one depth show how quickly heating declines below the surface.2 Temperature and exposure time work together, so a single hot afternoon does not prove the treatment succeeded.
Leave the plastic alone as much as possible. Every lifted edge vents heat and lets the bed dry. If a tear appears, patch it with durable tape or replace the sheet. Condensation under the plastic is normal and confirms that moisture is present, but it does not by itself confirm pest-killing temperatures.
After the plastic comes off
The treated bed will be vulnerable if you immediately dig it deeply. Remember that the hottest zone was near the surface. Turning the soil can bring untreated weed seeds up from below. If the goal was weed suppression, disturb the bed as little as possible afterward; UC IPM recommends keeping any cultivation shallower than two inches.2 Rake lightly, top-dress with finished compost if needed, and sow or transplant without deep digging.
This is where solarization pairs beautifully with fall gardening. After a midsummer treatment, the bed can be sown with carrots, beets, greens, cilantro, brassicas, or cover crops, depending on climate. Where the treatment worked, the first flush of fall crops may face less competition near the surface.
Do not leave the bed bare for long after treatment. Bare soil invites wind, crusting, fresh weed seed, and erosion. Plant it, mulch it, or sow a cover crop suited to the next planting window. Solarization is a pause with a purpose, not a permanent finish line.
When not to solarize
Skip solarization when the bed is shaded, when the season is too cool, or when you cannot spare an empty bed for several weeks. Do not attempt it around established perennials or other plants you intend to keep: the method requires bare soil, and temperatures that suppress pests can also injure living plant tissue.3 Heat affects non-target soil organisms too, even though many beneficials survive or recolonize quickly.
It is also not the best choice for gardeners trying to avoid single-use plastic. The sheet can sometimes be reused if handled carefully, but it will eventually tear or degrade. For some beds, stale seedbed cultivation, flame weeding, mulch, cover crops, hand weeding, or occultation with reusable tarps may be the better choice. Solarization earns its place when summer heat is abundant and the problem justifies the plastic.
Useful solarization supplies
- 3-by-200-foot, 4-mil clear plastic sheeting (affiliate link): transparent polyethylene for narrow beds or strips; measure generously for buried edges before buying.
- AcuRite soil thermometer (affiliate link): useful for checking how warm the upper soil is getting under the plastic.
- Galvanized landscape staples (affiliate link): useful for holding a sheet during installation; a continuous buried edge still provides the more reliable seal.
- 50-foot rubber soaker hose (affiliate link): helpful for moistening a bed evenly before the plastic goes on.
Final thoughts
Solarization is a strange little bargain with summer. For a few weeks, you give up a bed. In return, the sun does some of the work usually done by hoe, herbicide, or frustration. It is not appropriate everywhere, and it is not gentle enough to use casually, but in the right bed at the right time it can be elegant.
The best way to think of it is not as sterilizing soil, but as suppressing a specific problem in the treated upper layer. Some susceptible weed seeds and pathogens may be reduced; organisms deeper down can survive and return. The bed is not purified, but the next crop may start with less competition or disease pressure if the weather and installation did their work.