
A rain garden begins with a problem that is easy to ignore: water leaving a roof, driveway, patio, or compacted lawn too quickly. It runs across hard surfaces, carries sediment and pollutants, and joins the nearest drain or low spot. A rain garden does not make the rain disappear. It asks the water to slow down and enter the soil.
The U.S. Environmental Protection Agency defines a rain garden as a depressed landscape area that collects rainwater from a roof, driveway, or street and lets it soak into the ground. Vegetation and soil can reduce runoff, filter some pollutants, and provide wildlife habitat.1 The idea is simple enough for a yard, but the details matter. A rain garden is designed drainage, not a random wet bed.
Follow the water before digging
Watch more than one storm if you can. Find the exact roof plane, paving, or uphill ground that supplies the runoff; note where the flow concentrates and where it goes after passing the proposed basin. Measure that contributing area rather than the whole property. A downspout may drain only one section of roof, while a sloping lawn may add water from beyond the obvious hard surface.
The lowest place in the yard is not automatically the right place. Persistent ponding can reveal slow soil, a high seasonal water table, or another drainage problem. Wisconsin’s Department of Natural Resources advises against placing a rain garden where water already ponds and calls for an infiltration test at the proposed site, because the measured rate affects sizing.2 A rain garden is meant to fill briefly and drain, not remain marshy between storms.
Keep infiltration away from foundations, septic systems, wells, buried services, desirable tree roots, and unstable slopes.2 Exact setbacks vary, so check local stormwater, building, and public-health guidance and use the local utility-location service before excavation. If the runoff crosses a fueling area, contaminated soil, or another pollution hotspot, do not simply send it underground: EPA notes that poorly sited infiltration can move pollutants toward groundwater.3
Size the basin for this site, not a slogan
No single “percentage of roof area” works everywhere. Basin area and depth depend on the contributing surface, the rainfall event being managed, soil infiltration, slope, available space, and local rules. EPA’s bioretention guidance stresses that designs respond to site constraints and local climate, and that performance declines when a storm exceeds the volume a system was designed to treat.4 Use a local manual, calculator, or qualified designer rather than importing a ratio from a different soil and rainfall pattern.
Test infiltration where the basin bottom will actually be, following the local procedure. If the site drains too slowly, the sensible answer may be relocation, a smaller drainage area, or an engineered bioretention design with an underdrain—not an improvised soil amendment. On difficult sites, changing the planting soil without a designed outlet does not guarantee drainage.4
A working rain garden has a stable inlet, a shallow storage basin with a level bottom, suitable soil, a planted surface, and a defined overflow. The level bottom spreads water instead of concentrating it at one end. On a slope, excavated soil may form a compacted downslope berm, but one low, armored spill point must remain so an exceptional storm leaves by a route that does not threaten a building, path, neighbor, or erodible bank.4
Give the water a quiet entrance and a clear exit
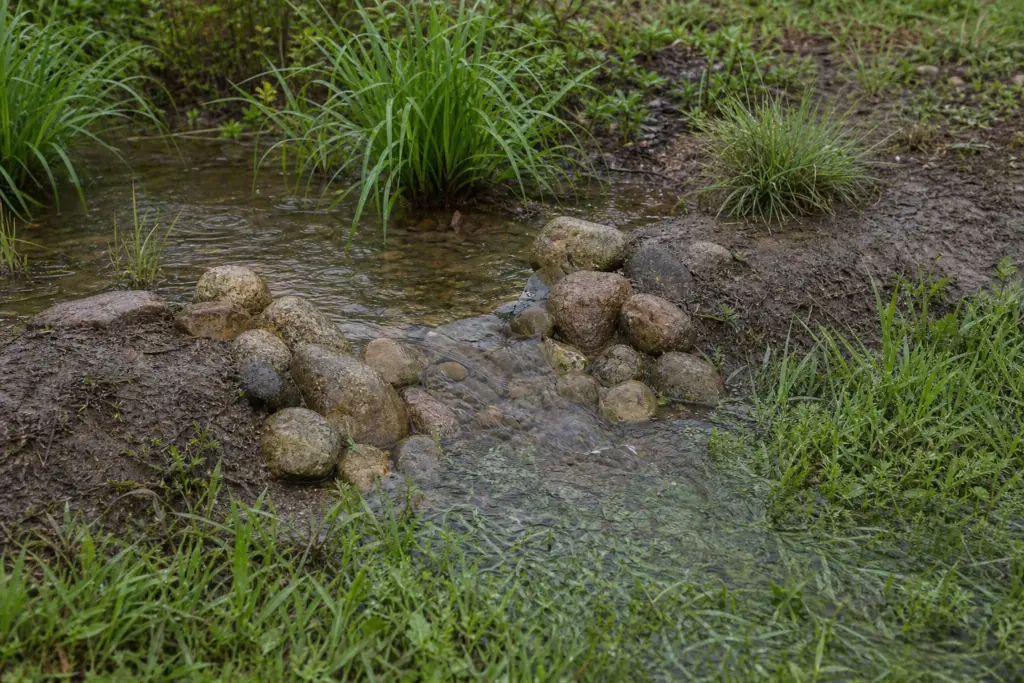
Concentrated water can cut through fresh soil and float mulch out of the basin. Shorten or redirect the downspout with a sound, accessible connection, then slow the inlet with a small stone apron, dense sedges, or another detail recommended for the expected flow. The goal is not a decorative dry creek that races water through the garden; it is a stable entrance that spreads the pulse without scouring roots.
The overflow deserves the same attention. Set its elevation deliberately, protect it from erosion, and trace its route all the way to a safe discharge area. A rain garden can reduce runoff from the storms it is sized to receive, but it is not a promise of flood control in every downpour. EPA notes that bioretention may reduce local flooding yet may not control extreme storms.4 If failure would send water into a basement or across a property line, obtain professional drainage advice.
Plant the moisture gradient
A rain garden is several habitats in a few metres. The flat center receives the deepest, longest wetting and then dries. Side slopes drain sooner. The rim may behave like an ordinary border. EPA recommends plants at the bottom that tolerate both wet and dry conditions, with upland plants toward the edges.4 “Likes moisture” is not precise enough; pond plants that require permanent water can fail in a properly draining basin.
Choose species for the local climate, light, soil reaction, winter conditions, mature size, and each moisture zone. Locally native plants can contribute habitat and often fit regional weather, but native does not mean suitable for every position, maintenance-free, or immune to drought during establishment. Avoid locally invasive species, and use enough repeated grasses, sedges, perennials, or shrubs for roots and stems to slow flow without turning the inlet and overflow into a thicket. Our guide to planting the wet center, side slopes, and dry rim develops that palette in more detail.
Mulch must stay where it is useful. A stable organic mulch can protect soil and suppress weeds, but loose chips placed directly in a fast inlet may raft into the overflow. Leave inspection space around both structures. Water young plants through establishment according to species and weather; a basin designed to catch rain can still be dry for weeks between storms.
Let the first storms inspect the work
After a moderate rain, watch the whole sequence. Does water reach the garden, spread across the level bottom, and remain below the planned overflow? Is the inlet eroding? Has sediment formed a small delta? Does the spillway release excess without cutting a channel? Mark the high-water line and the time when the basin empties. University of Maryland Extension says a well-designed rain garden should drain within 24 to 48 hours.5
Water lingering beyond the local target is a diagnostic sign, not an invitation to add wetland plants and ignore it. Sediment may have sealed the surface; the outlet may be too high; the soil test may have missed a restrictive layer; or groundwater may be seasonally high. Prompt drainage also protects plants that tolerate brief inundation but not permanent saturation and restores storage for the next storm.4
For the first growing seasons, weed before roots become difficult to remove, replace failed plants with better-suited species, and keep the inlet and overflow open. EPA’s maintenance guidance calls for checking sediment at the inlet, erosion at the outlet, plant health, invasive plants, and mulch or debris blocking the overflow.4 The companion article on rain-garden checks after the first storm gives that inspection a practical rhythm.
Know when the problem is larger than a garden
A small residential rain garden is not the right tool for every wet yard. Chronic groundwater, a failing foundation drain, sewage or septic issues, runoff from a large commercial surface, a steep or unstable site, or water that already damages buildings calls for professional assessment. In some places a lined or underdrained bioretention cell is appropriate; elsewhere infiltration may be prohibited. Permits and approved overflow connections are local questions.
When the site is suitable, the pleasure of a rain garden is its legibility. You can see water arrive, spread, quiet down, and disappear into a living bed. That visible sequence turns runoff from an inconvenience into a design material—without pretending that plants can repeal gravity or that one basin can absorb every storm.
References
- U.S. Environmental Protection Agency: “Soak Up the Rain—Rain Gardens”
- Wisconsin Department of Natural Resources: “Rain Gardens—A Guide for Homeowners and Landscapers”
- U.S. Environmental Protection Agency: “Green Infrastructure and Groundwater Protection”
- U.S. Environmental Protection Agency: “NPDES Stormwater Best Management Practice—Bioretention (Rain Gardens)”
- University of Maryland Extension: “Rain Gardens”