

The most important rooftop garden decisions happen before the first planter is purchased. A roof is not a patio that happens to be higher. It has load limits, drainage paths, waterproofing, wind exposure, access issues, and safety edges. Design begins with those facts, then moves toward plants.
That order can feel frustrating when herbs, grasses, and flowering perennials are the enjoyable part. It is also what prevents a promising garden from becoming too heavy, awkward to water, or risky to maintain. A useful first plan is therefore less a planting chart than a map of constraints: what the building permits, where people can move, where water can go, and which parts of the roof receive the harshest sun and wind.
If you are still deciding whether the site is suitable, begin with this broader guide to rooftop structure, wind, and water. Once those fundamentals look workable, the steps below turn them into a container layout.
Separate a container garden from a built green roof
The terms are often blurred, but the construction is different. A green roof is an engineered assembly laid over part or all of a roof. Depending on the system, it can include waterproofing, a root barrier, drainage and water-retention layers, growing media, and plants. Such roofs can slow stormwater runoff and reduce heat at the roof surface, but their performance depends on the design and local conditions.1, 3
A rooftop container garden keeps plants in discrete pots or planters. That can make the layout easier to change, but it does not remove questions about structure, drainage, membrane protection, wind, or safe access. Do not spread soil over a roof or attach screens, trellises, and planters to the building unless the system has been designed and approved for that use.
Get the load path and roof membrane checked
Ask the owner or property manager what gardening is allowed, whether access and edge protection are adequate, and which areas—if any—are approved for added loads. If the answer is uncertain, a structural professional familiar with the building should assess the proposal. Do not borrow a generic weight allowance from another rooftop: roof construction, span, condition, and load distribution vary.
Plan from wet weight, not the pleasingly light pot you carried from the shop. The US Environmental Protection Agency advises accounting for green-roof loading under fully saturated conditions.2 For a container garden, the same conservative habit means counting the container, wet growing medium, mature plant, stored irrigation water, furniture, paving, people, and temporary materials. A manufacturer may list a planter’s empty weight while saying little about the filled system.
Locate the waterproofing and its protection layer before deciding how containers will sit. Broad, approved supports may spread contact and allow inspection beneath a planter; improvised feet can concentrate force or abrade the membrane. Never drill through the roof or hide a suspicious blister, seam, or leak. The building’s roofing professional can specify compatible pads, clearances, and attachment methods.
Draw the water route before the planting plan
Mark every drain, scupper, overflow route, doorway, service hatch, and hose connection on a simple plan. Keep drainage points visible and reachable; a row of planters should never become a wall that conceals leaves and sediment around an outlet. Leave enough clearance to lift a grate, inspect the membrane, and move a container without dismantling the garden.
Then decide how water will reach the plants. Containers can dry faster than beds in the ground, and reliable drainage is essential.5 A nearby tap, a correctly installed drip system, or self-watering containers may reduce missed watering, but none is automatic insurance. Check emitters, provide a way to isolate the line, and observe where excess water travels. Timers need adjustment as weather and plant size change.
Run a small test before filling every pot. Water the proposed container, confirm that its outlet remains free, and watch the roof during and after drainage. The useful detail is not merely that water leaves the pot, but that it reaches an approved roof drain without ponding around supports or crossing a walking route. The companion guide to keeping a rooftop garden alive above the street covers the ongoing observations that follow this initial design.

Design for wind, sun, and working access
Visit the roof at more than one time of day if access rules allow. Note hard afternoon sun, reflected heat from walls or glazing, shade cast by plant rooms, and the corridors where wind accelerates around corners. Conditions can change with the season, so a single calm spring visit is not a complete site survey.
Wind affects both plants and hardware. Lower plant profiles, flexible stems, stable wide-based containers, and carefully placed shelter can help in exposed positions. A solid screen is not simply a plant accessory, however: it catches wind and may add a significant force to its supports. Any screen, pergola, shade sail, or tall trellis needs an attachment and wind-load solution approved for that roof.
Draw a comfortable route from the door to each planter, drain, tap, and seating area. Gardeners need room to carry water, prune, turn a container, and remove spent plants without stepping over irrigation tubing. Preserve required exits and access to building equipment, and keep furniture and climbable objects where they do not compromise safe edges. Local rules and the building manager, rather than a generic garden diagram, determine the exact clearances.
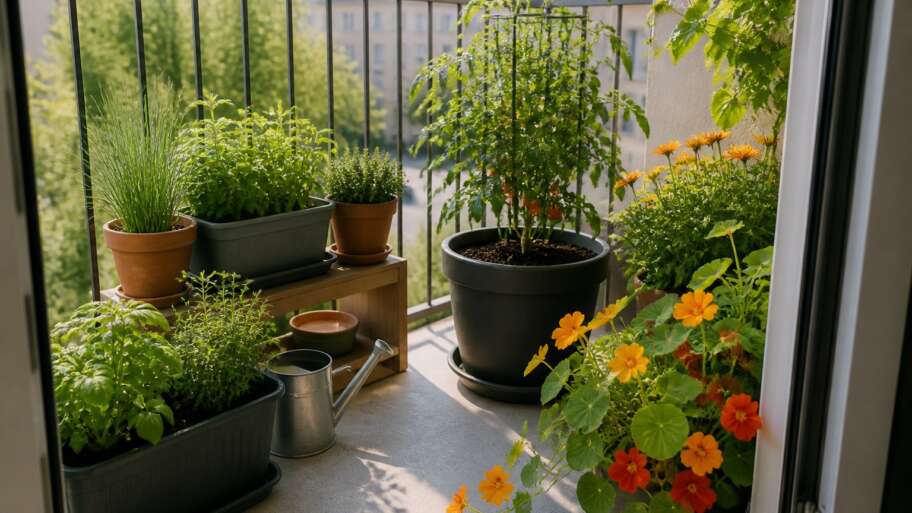
Choose containers and growing media as one system
Container size influences more than appearance. A larger volume usually changes the wet weight, root room, watering interval, and effort required to move the planter. Materials also behave differently: some heat quickly in sun, some lose moisture through porous walls, and some become brittle in frost or ultraviolet light. Choose for the site’s exposure and for the maintenance you can actually provide.
Use a growing medium formulated for containers rather than filling pots with garden soil alone. Illinois Extension notes that garden soil by itself can limit drainage and aeration, while container media must balance air space, drainage, and water retention.4 “Lightweight” is a useful comparison, not a structural guarantee: obtain a realistic saturated weight for the complete container and let the structural assessment set the limit.
Every planter needs an unobstructed outlet and a detail that keeps roots and fine particles from simply sealing it. Avoid saucers that remain full after rain unless they are an intentional, monitored part of a suitable system. Mulch can moderate evaporation, but select material that will stay put rather than scattering across the roof in the first gust.
Build the plant list around the roof’s exposure
Only now is it time to make the plant list. Match plants to the measured light, local winters and summers, available root volume, wind, and irrigation plan. Michigan State University Extension emphasizes that shallow media, drought, heat, and exposure shape plant selection on extensive green roofs.6 Containers are not identical to an extensive green roof, but their restricted root volume can create similarly unforgiving conditions.
Sedums, compact herbs, ornamental grasses, and tough perennials can be useful candidates, not a universal shopping list. A plant that handles dry summers may still fail in cold wet media, and a locally native species is not automatically suited to a shallow, windy pot. Check mature height and spread as carefully as flower colour. Tall shrubs and small trees require enough root volume plus a credible plan for stability, pruning, and eventual removal.
Make one usable room, then test it
A small roof can feel larger when planters define edges, leave a clear route, and frame one good sitting place. Repetition helps. Three large planters often look calmer than fifteen tiny pots, provided their weight and position have been approved. Grouping plants with similar water needs also makes irrigation easier to understand.
Start with one modest zone and watch it through rain, heat, and wind before expanding. Record how quickly containers dry, where leaves collect, whether a chair blocks the working route, and how the planting looks from inside the building as well as on the roof. Rooftop design is successful when structure, drainage, access, and maintenance make the planting feel inevitable. The result is a place to garden, not a place where plants are forced to endure.
References
- US Environmental Protection Agency: Using Green Roofs to Reduce Heat Islands
- US Environmental Protection Agency: Soak Up the Rain—Green Roofs
- Whole Building Design Guide: Green Roofs
- University of Illinois Extension: Soil for Container Gardens
- University of Illinois Extension: Six Tips for Watering Container Gardens
- Michigan State University Extension: Selecting Plants for Extensive Green Roofs in the United States