
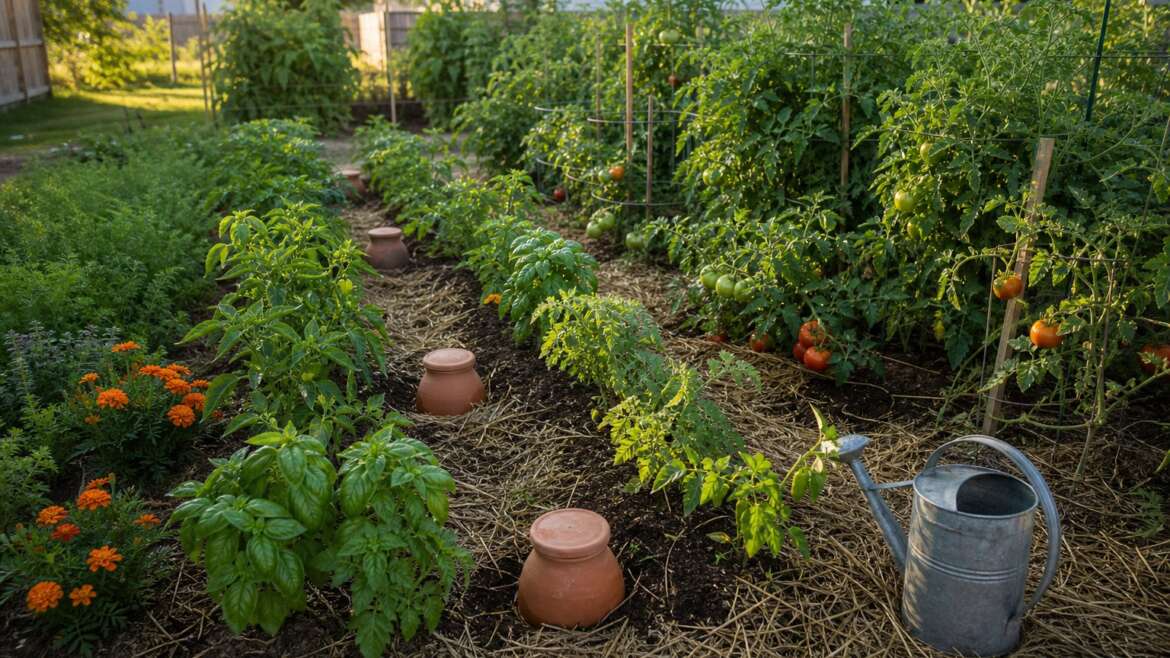
An olla is a humble irrigation device: an unglazed clay vessel buried in soil, filled with water, and covered. Its usefulness comes from the material. Water can pass slowly through the pores of unglazed clay, entering the soil close to roots instead of wetting paths, leaves, and every empty patch between plants.
The method is old, low-tech, and still sensible at small scale. University of Arizona Cooperative Extension describes olla irrigation as a conservation system for situations where pressurized or filtered irrigation is impractical.1 The appeal is not nostalgia. It is targeted delivery, achieved with a reservoir that can be filled by hand.
The name olla is Spanish for a clay pot, but the irrigation method should not be assigned a tidy single origin. A peer-reviewed history identifies written instructions for buried-pot irrigation in a Chinese agricultural text more than two millennia old.2 That record shows longevity, not a universal design or a promise that every old method suits every garden.
Clay and soil make the valve
An olla is not simply a leaky jar. Its porous wall separates wetter conditions inside from drier soil outside. The resulting soil-water potential gradient moves water through the clay; as nearby soil becomes wetter, that gradient weakens. Clay porosity, water depth in the vessel, soil texture, weather, roots, and plant demand all affect the rate.1
This response is useful, but it is not electronic sensing. A cracked pot can empty quickly, a very dense pot can seep too slowly, and saturated soil can remain unhealthy even beside an olla. For a closer treatment of the soil physics around an olla, it helps to picture a changing moisture gradient rather than a device deciding when a plant is thirsty.
Choose and test the vessel
A purpose-made irrigation olla normally has a round belly, narrow neck, and lid. The wall must be unglazed, sound, and clean. Glaze blocks the pores; a hairline crack bypasses them. The neck keeps the fill point visible above soil and gives the reservoir less open surface from which to evaporate. Buy a capacity that fits a cluster of plants rather than assuming the largest pot is automatically best.
A simple terracotta flowerpot can be adapted by sealing its drainage hole, and two matching pots can be joined to make a larger reservoir. Arizona Extension specifies a watertight material such as food-grade silicone for this job.1 Let the seal cure fully, then fill the vessel on a dry surface. Slow, even darkening through the clay is useful; a stream from the base is not. A failed seal turns a slow irrigation tool into a hidden puddle.
Bury it for contact, not display
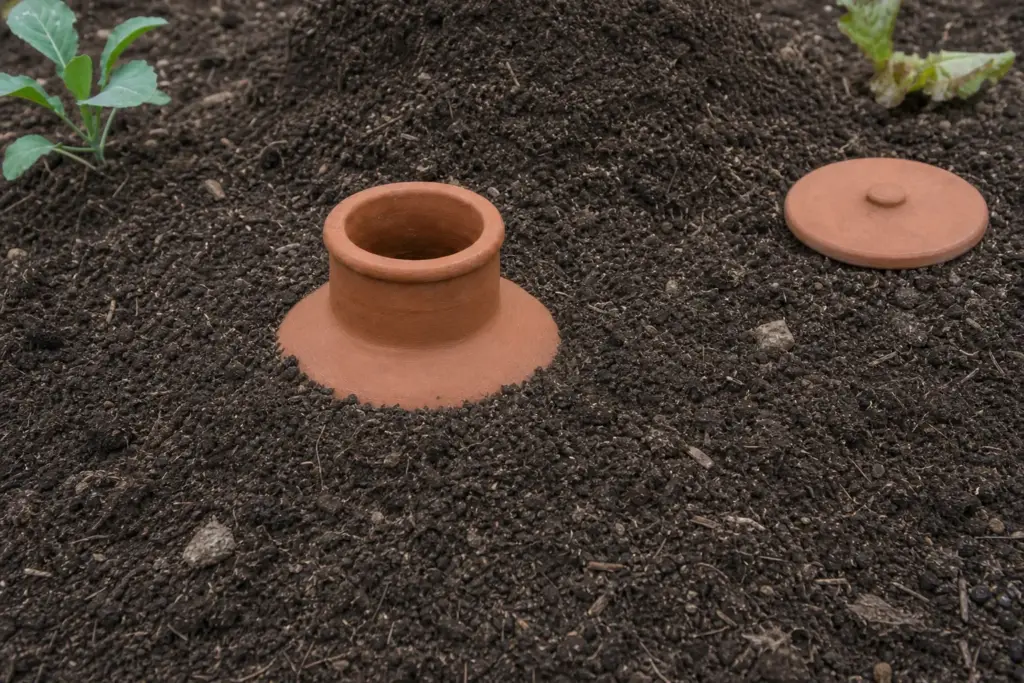
Install the olla before nearby plants depend on it. Dig a hole only a little wider than the belly, seat the pot upright, and backfill in stages. Soil should meet the clay wall without large air pockets. University of California Agriculture and Natural Resources advises leaving roughly one to two inches of the vessel above the surface and gently firming soil around it.3
Keep the neck visible and cover the opening. A fitted lid, inverted saucer, or stable flat cover limits direct evaporation and keeps soil, debris, animals, and mosquitoes out.3 Do not bury the mouth under mulch simply to make the bed look seamless. A hidden fill point is easy to step on and easier to forget.
Let your soil set the spacing
No spacing chart can see your soil. New Mexico State University notes that water tends to move downward more readily in sand, while heavier soil can move it farther sideways but may also remain saturated too long.4 Vessel size and porosity matter too. Treat any advertised wetting radius as a starting estimate, not the edge of an invisible irrigation circle.
Map the real pattern. Fill the olla, water the bed once from above to settle soil and establish initial contact, then check moisture at several distances and depths over the next few days. A finger, narrow trowel, or soil probe is more informative than judging the dry surface. Repeat the check during hotter weather, when both soil drying and plant use change.
Place the olla first, then arrange plants around the moist zone. This reverses the usual garden habit of planting first and solving irrigation later. One vessel can suit a compact group of compatible vegetables or herbs; broad rows and densely sown beds may require so many vessels that another irrigation method is simpler.3 Leave enough room to reach the lid when foliage matures.
Give seedlings a bridge to hidden water
Subsurface water does little for a seed waiting in the top centimetre of dry soil. Direct-sown crops still need gentle surface watering until germination and early roots can explore the damp zone. New transplants may also need ordinary watering for several weeks while roots grow toward the vessel.13 An olla waters a root system; it does not mist a seedbed.
Herbaceous plants, flowers, and many vegetables are better candidates than large woody plants whose expanding roots may eventually damage the clay.1 Match crops by more than thirst: mature spread, rooting habit, shade, harvest access, and local climate still count. Mulch after planting, keeping it clear of the fill opening, to slow surface evaporation and moderate soil temperature.
Make refilling observable
Ollas fail quietly when forgotten. Refill frequency changes with pot size, soil, weather, and the plants using the wet zone.1 Check daily during the first hot spell, then record how much water remains and how the plants look. The goal is not a universal schedule; it is a reliable local rhythm. A visible neck and lid turn hidden irrigation into a task that can be inspected.
A sudden change in that rhythm deserves attention. Faster emptying can mean hotter weather, larger plants, a failed seal, or a crack. Slower seepage can follow rain, reduced plant demand, or mineral buildup in the pores. Arizona Extension lists salt clogging as a disadvantage of the system.1 Our guide to the white crust on terracotta explains what those deposits record.
In a climate with hard freezes, lift the olla before winter if water could remain inside; UC ANR warns that freezing can crack a buried vessel.3 Empty it, let it dry, brush away loose soil, and store it where it will not be knocked or saturated. Mark its former position if the bed layout will be repeated.
Know what an olla cannot promise
Studies and extension guides report substantial water savings in particular comparisons, but there is no honest percentage for every garden. Efficiency depends on what the olla replaces, whether it leaks, the wetting area that roots actually reach, rainfall, mulch, weed competition, and refilling practice.12 A buried pot is neither drought-proof nor maintenance-free.
Ollas also occupy root space, cost money or time to make, and become awkward when a planting layout changes. Hand filling several pots can be more work than maintaining one well-designed drip zone. They are best understood as small reservoirs for concentrated plantings, containers, and gardens where low pressure and simple materials are advantages—not as a universal replacement for irrigation planning.
Turn the reservoir into a garden habit
In a kitchen garden, checking an olla can join the same round as harvesting basil, tying tomatoes, and looking beneath leaves for pests. Lift the lid, note the level, inspect the plants, and feel the soil outside the expected wet zone. A quick refill is useful only when paired with enough observation to notice a leak, a wilted transplant, or soil that stays too wet.
Olla irrigation is best understood as a garden habit rather than a gadget. It asks the gardener to plant in relation to hidden water, check quietly, and trust a small clay reservoir to do one job well. Used at the right scale, with its limits visible, that is enough.
References
- University of Arizona Cooperative Extension: “Irrigating with Ollas”
- David A. Bainbridge, Agricultural Water Management: “Buried clay pot irrigation: a little known but very efficient traditional method of irrigation”
- University of California Agriculture and Natural Resources: “Olla Irrigation”
- New Mexico State University: “Oh, Yeah! Ollas!”