
Ollas deserve their quiet reputation. A buried unglazed clay pot can water a small root zone slowly, below the soil surface, with very little equipment. That is useful. It is also easy to exaggerate. The best way to use an olla is to treat it as a practical irrigation tool, not as a spell against drought.
University of Arizona Cooperative Extension describes olla irrigation as a conservation system using buried porous clay vessels. Its publication cites potential water savings compared with watering-can irrigation, but the important word is potential.1 Performance depends on the vessel, soil, crop, weather, spacing, and refill habits. An olla can reduce wasted watering in the right place; it cannot make those variables disappear.
What the clay pot is actually doing
An irrigation olla holds water on one side of a porous clay wall and soil on the other. Water moves through that wall in response to a pressure-head or soil-water-potential gradient. As nearby soil dries, the gradient can become stronger; as it wets, the gradient weakens. The pot is responsive, but it is not an electronic valve and roots are not literally switching it on.
Controlled pitcher experiments found that seepage changed with evaporative demand and with the clay wall’s hydraulic conductivity.2 That helps explain why two pots of the same size may empty at different rates. Clay mixture, firing, wall thickness, surface area, the water level inside, soil contact, and the weather all affect flow. A generic spacing chart cannot know those details.
The method is old, although its history should not be flattened into one tidy origin story. A peer-reviewed review of buried-clay-pot irrigation points to written instructions in a Chinese agricultural text more than two millennia old and describes related use across dry regions.3 Longevity shows that the idea can be useful. It does not prove that every modern pot or garden layout will perform alike.
Choose a job small enough for the tool
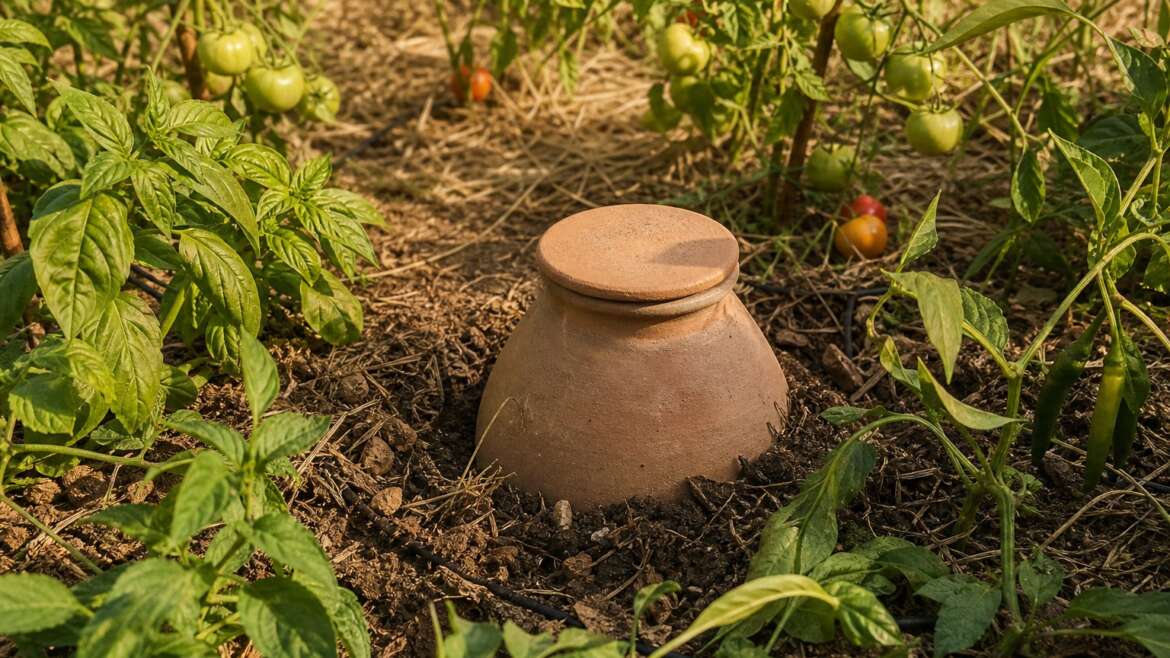
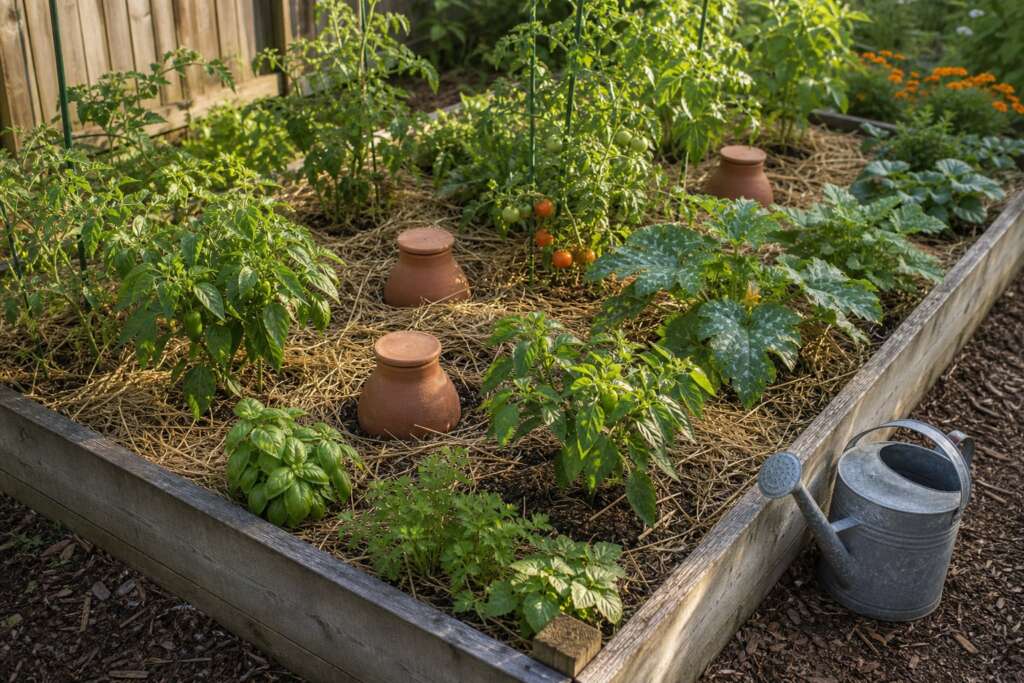
Ollas are easiest to justify in containers, compact raised beds, and clusters of plants whose roots can reach one local wetting zone. A tomato with nearby basil, or a tight group of peppers, is a clearer assignment than an entire row of scattered crops. A large bed may need several vessels, which adds cost, planting-space loss, and several lids to open and refill.
Soil changes the shape of the wet zone. New Mexico State University notes that water tends to move more downward in sand, while heavier soil may spread it farther laterally but can remain oversaturated if drainage is poor.4 Compaction, layering, cracks, and initial moisture complicate that simple texture rule. Treat the damp area around your own olla as something to observe, not a fixed circle printed on the package.
Established fibrous-rooted vegetables are better candidates than newly sown seed or plants far outside the wetting zone. Seedlings and fresh transplants usually need surface watering while their roots establish.1 Long-lived woody roots can crowd or crack a clay vessel, so a fragile olla beside a tree or shrub is a different proposition from one serving annual vegetables.5
Size and place an olla by testing
A larger reservoir may lengthen the time between refills, while a larger or more conductive porous surface can supply water faster. Neither dimension alone sets the reach. Arizona’s Extension review says research on ideal spacing is limited and that soil, plant, and climate determine the useful distance.1 Buy or make one test vessel before committing a whole bed to an unverified pattern.
Install the olla before nearby roots fill the space. Bury the body while leaving the neck slightly above the soil so runoff, mulch, and loose soil do not fall inside. Firm soil gently against the wall; air gaps interrupt contact between clay and soil. Fill the vessel and cover the opening. UC Agriculture and Natural Resources recommends a lid to limit evaporation and mosquito breeding, and surface watering for seed germination when the top layer remains dry.5
Then test the bed. After filling the pot, probe the soil at several distances and depths with a trowel or moisture probe, taking care not to strike the clay. Repeat in ordinary weather and again during a hot, windy spell. Place roots within the zone you actually find. For a closer explanation of the gradient rather than the gadget, see the quiet physics of an olla garden.
Make refilling part of the design
There is no honest universal refill interval. Hot sun, wind, leaf area, fruit load, dry soil, and a more conductive pot can all shorten it. Rain or cool weather may lengthen it. The laboratory work on pitcher irrigation found seepage responding strongly to evaporative demand, while the Extension sources emphasize soil type, plant density, and weather.25
For the first few weeks, check the level often and record how much water you add. That simple log reveals whether a vessel lasts hours, days, or longer in that exact bed. Keep the cap in place, but do not let it become an excuse to ignore the plants. Check soil both near and beyond the pot, and give supplemental surface irrigation when seedlings, shallow roots, or an exceptional heat wave require it.
Treat water-saving numbers as local results
The much-repeated percentage claims need a denominator. The Arizona publication cites 60–70 percent savings against conventional watering-can irrigation in one source.1 That is not the same comparison as a carefully scheduled dripline, a mulched bed in a cool climate, or a gardener who already waters accurately by hand.
The broader research review makes the limitation explicit: water-use efficiency depends on soil, crop, management, weed competition, and microclimate, and controlled pot-irrigation experiments were relatively few.3 Measure your own water added per week and compare crop performance with the method you would otherwise use. Saving water on paths and bare surface is valuable; claiming a universal percentage is not.
Watch the clay for clues
If an olla suddenly empties much faster, suspect a crack or failed DIY seal. If it slows markedly, mineral deposits may be reducing seepage through the pores; Arizona Extension lists salt buildup and clogging among the drawbacks.1 A pale deposit is not automatically mold. Our guide to why terracotta pots grow a white crust explains what water and fertilizer can leave behind on porous clay.
Use clean water, keep debris out, and inspect according to the vessel maker’s guidance. In hard-freeze climates, remove the olla for winter or follow the manufacturer’s frost instructions; trapped water can crack porous clay.5 Mark its position so a fork or boot does not find it first. A DIY olla made from unglazed terracotta can work, but its drain holes and joins must be watertight and the sealant suitable for the intended garden use.14
Know when another method fits better
Ollas are awkward for broad, densely planted annual beds, sites where nobody can refill them, and layouts that must change every season. They also lose their advantage when pots occupy more growing space and budget than a simple drip or soaker system would. UC ANR specifically notes that dense annual plantings may require too many vessels for efficient coverage.5
The honest promise of an olla is not that it eliminates watering. It moves a small reservoir underground and meters water through porous clay near selected roots. In the right container or compact bed, that can be an elegant, low-pressure habit. Its success still belongs to placement, refilling, observation, and the weather.
References
- University of Arizona Cooperative Extension: Irrigating with Ollas
- Abu-Zreig, Abe, and Isoda: The auto-regulative capability of pitcher irrigation system
- Bainbridge: Buried clay pot irrigation—a little known but very efficient traditional method of irrigation
- New Mexico State University: Oh, Yeah! Ollas!
- UC Agriculture and Natural Resources: Olla Irrigation